Microsoft Office365 Events
Introduction:
This document will guide you through the steps to create and manage events in Microsoft Office365. We will cover the setup process from the beginning, how to use Office365 Calendar and Outlook for events, and provide login details for these services.We have also included instructions on how to integrate with the API to create calendar events.
Steps to Log In to the Azure Portal:
- Open your web browser and go to Azure Portal. (https://portal.azure.com/#home)
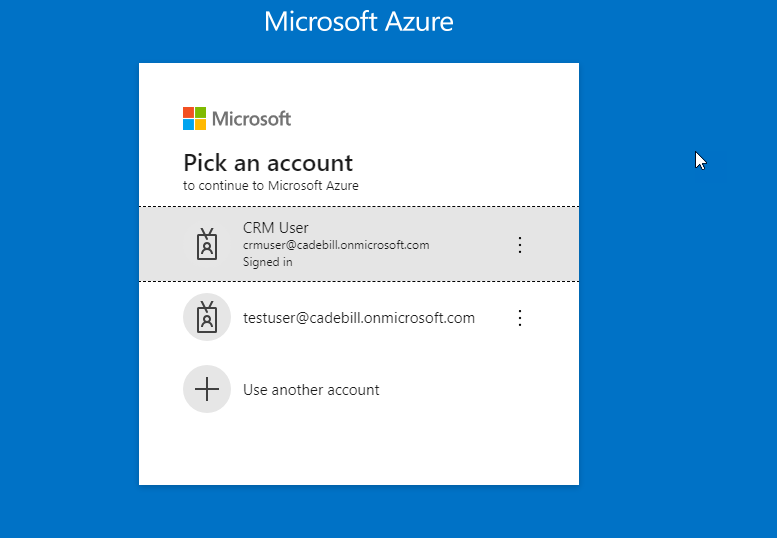
- You will see the Microsoft Azure login page. Enter your Azure account email address and click Next.
- Enter your password and click Sign in.
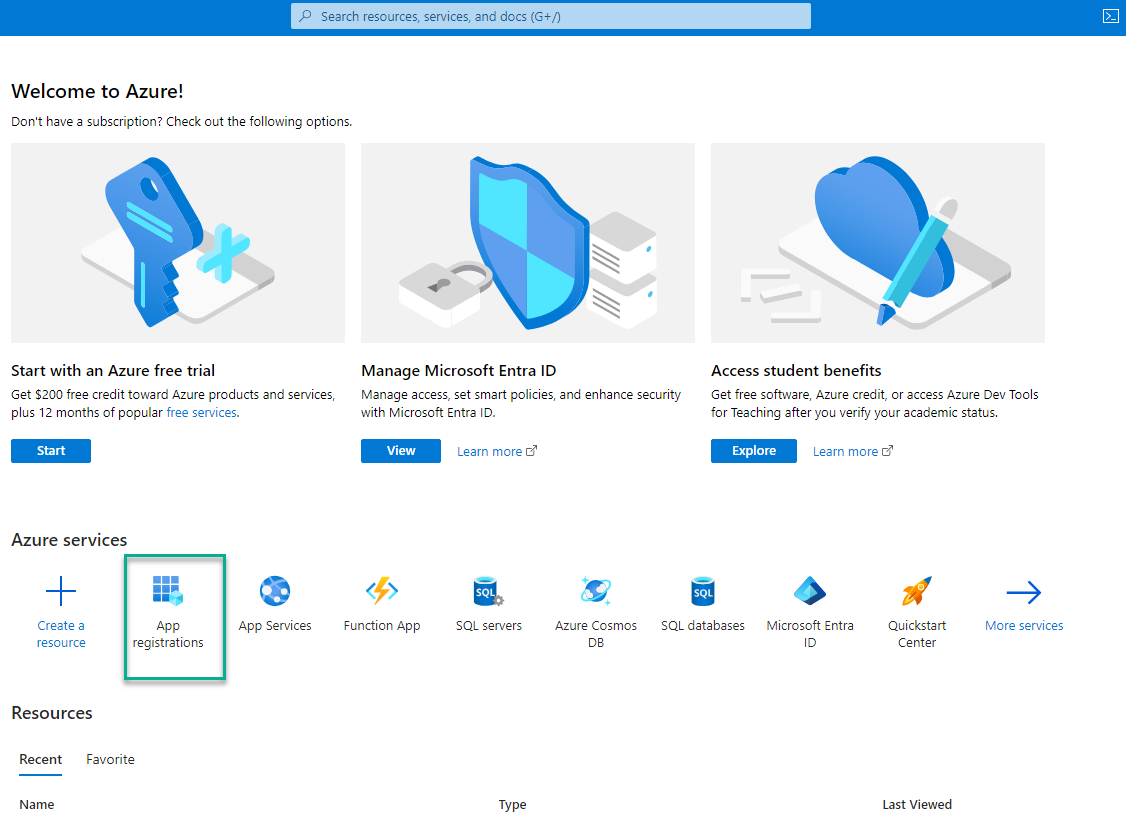
This is the home page of the Azure portal. Here, we need to create a new App Registration.
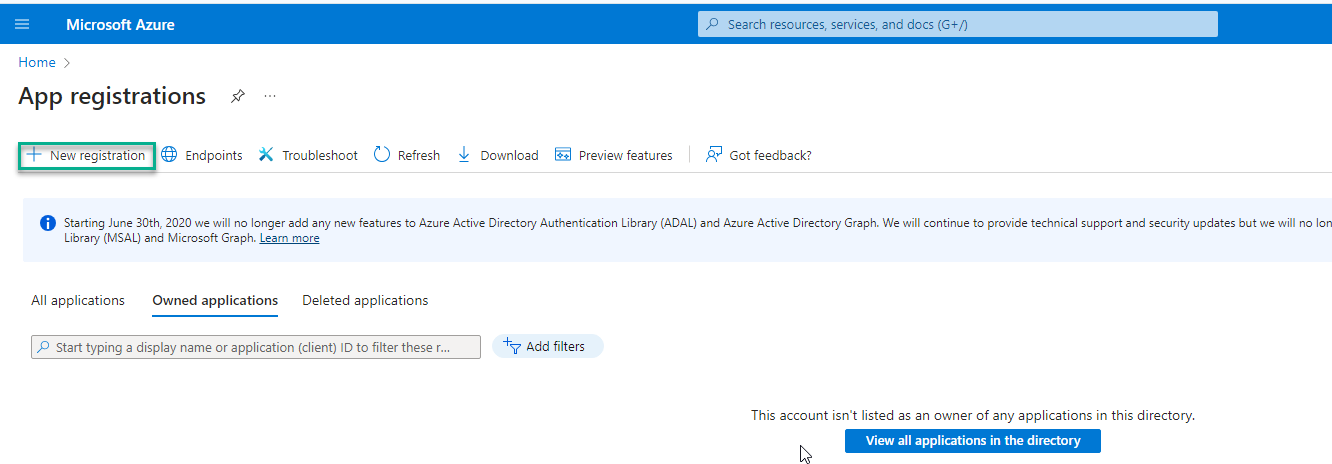
If you have already registered an app, you can use the existing one. To create a new registration, click on the '+ New Registration' button.
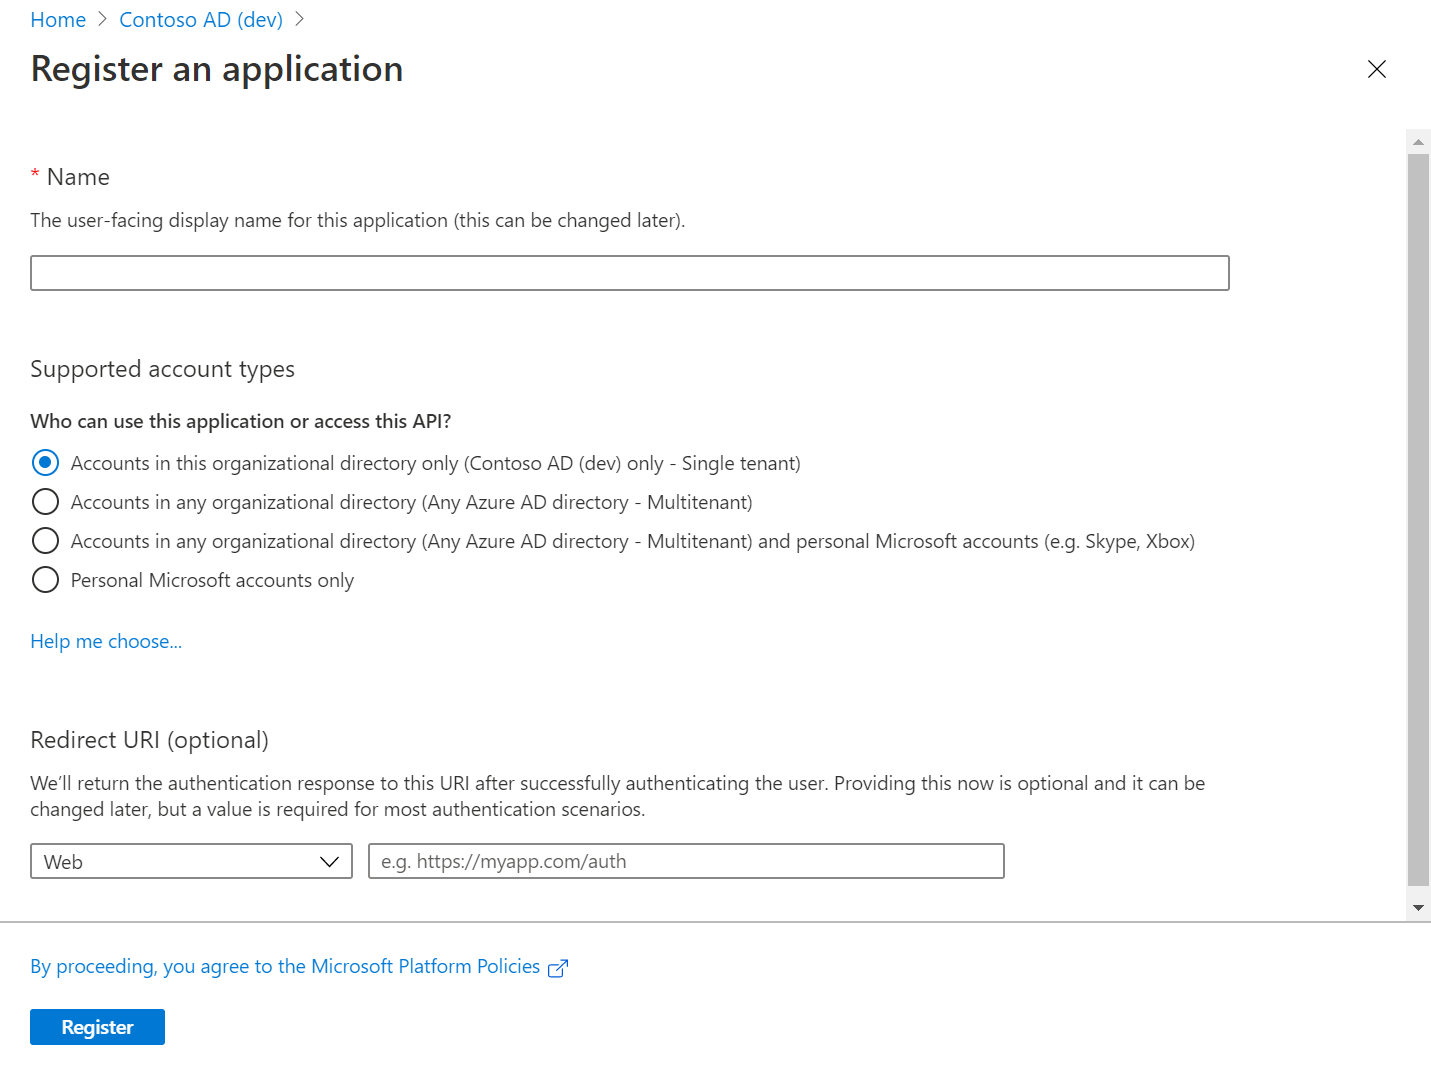
Register an application:
- Enter a display Name for your application.
- Don't enter anything for Redirect URI (optional). You'll configure a redirect URI in the next section.
- Select Register to complete the initial app registration.
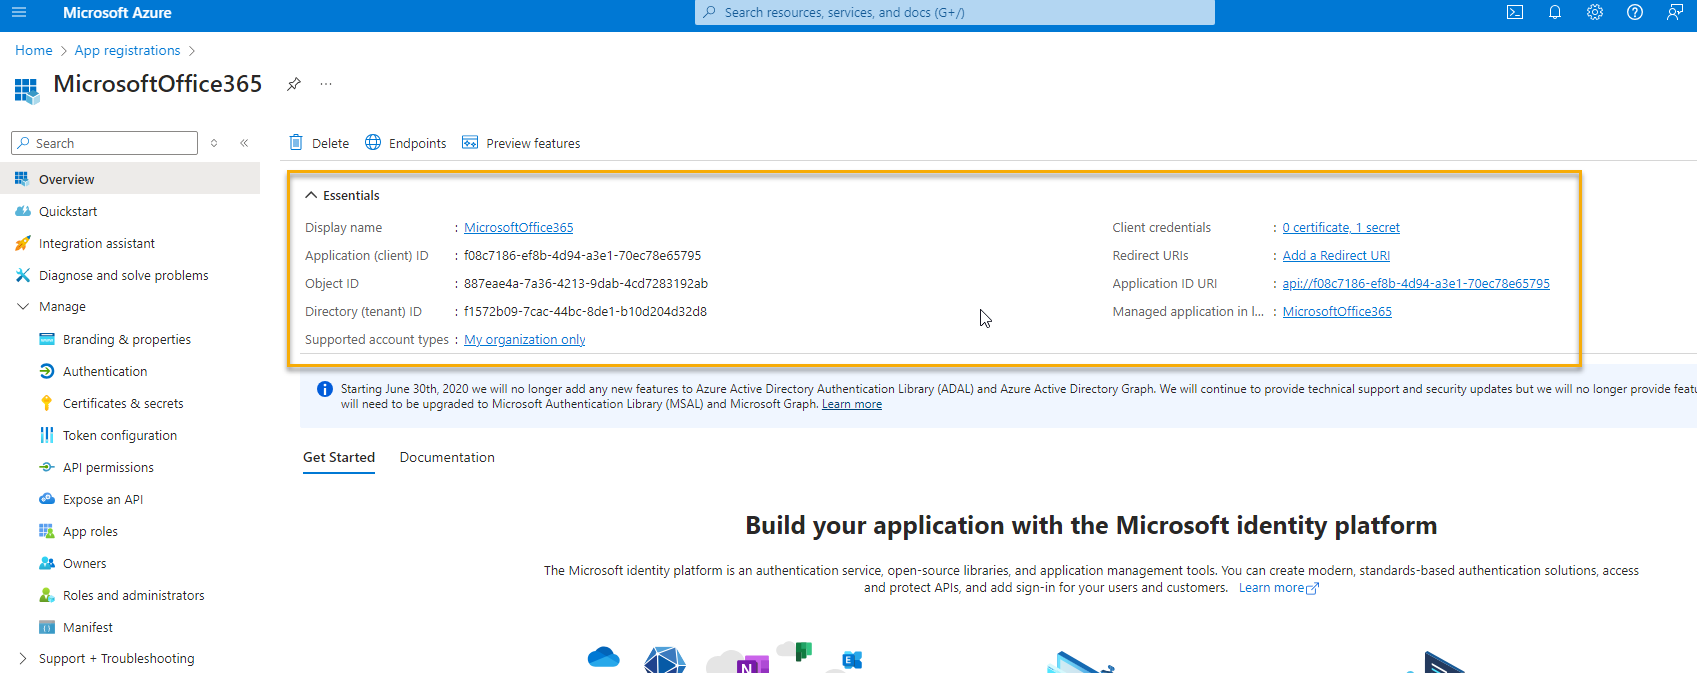
When registration finishes, the Microsoft Enter admin center displays the app registration's Overview pane.
Add a client secret:
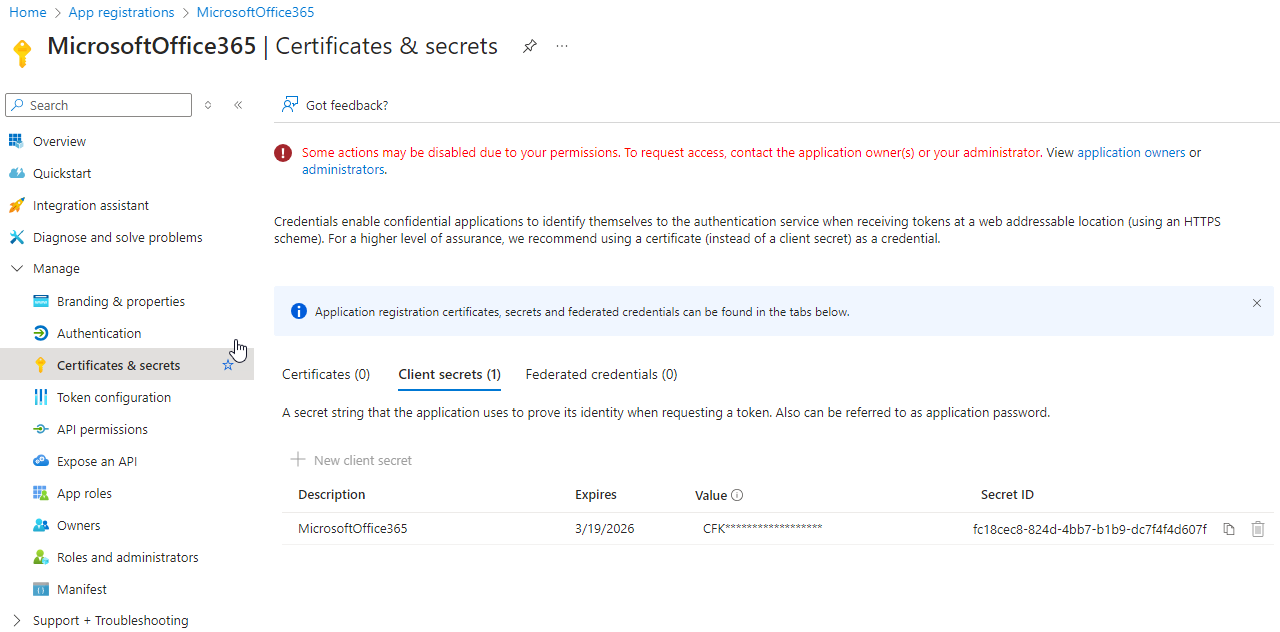
- Select Certificates & secrets > Client secrets > New client secret.
- Add a description for your client secret.
- Select an expiration for the secret or specify a custom lifetime.
- Client secret lifetime is limited to two years (24 months) or less. You can't specify a custom lifetime longer than 24 months.
- Microsoft recommends that you set an expiration value of less than 12 months.
- Select Add.
- Record the secret's value for use in your client application code. This secret value is never displayed again after you leave this page.
Add Permissions:
- Under the application's API permissions page, choose Add a permission.
- Select Microsoft Graph.
- Select Application permissions.
- In the Select Permissions dialog, choose the permissions to configure to the app.
Get Access Token:
Next, we need to get the access token. We can obtain the access token using the client ID, client secret, scope, tenant ID and grant type that we have so far. We have created a separate method in our WebhooksAPI for this. When this method is called, we can get the access token. Only after obtaining the access token can we create events in Office 365.
We can get access token with following way,
- Client_id :- This is the application unique Id , this is also required fields for get access token
- Base URL :- login.microsoftonline.com
- Scope : this is the required , we have to set scopes fields default example https://graph.microsoft.com/.default
- Client_secret :- this is password for app use to authenticate with the MS platforms.
- Grant_type : This is Required for get access Tokens , default we need to set grant_type as client_credentials
Token Request:
{
"TenantId": "f1572b09-7cac-44bc-8de1-b10d204d32d8",
"BaseURL": "login.microsoftonline.com",
"Scopes": "https://graph.microsoft.com/.default",
"ClientId": "f08c7186-ef8b-4d94-a3e1-70ec78e65795",
"ClientSecret": "CFK8Q~EsXgcWU-f03h0Br0hjDjBNya-R9PsCeapK"
}
Token Response:
{
"token_type": "Bearer",
"expires_in": 3599,
"ext_expires_in":3599,
"access_token": "eyJ0eXAiOiJKV1QiLCJhbGciOiJSUzI1NiIsIng1dCI6Ik1uQ19WWmNBVGZNNXBP..."
}
Create Event:
Create an event in the user's default calendar or specified calendar.
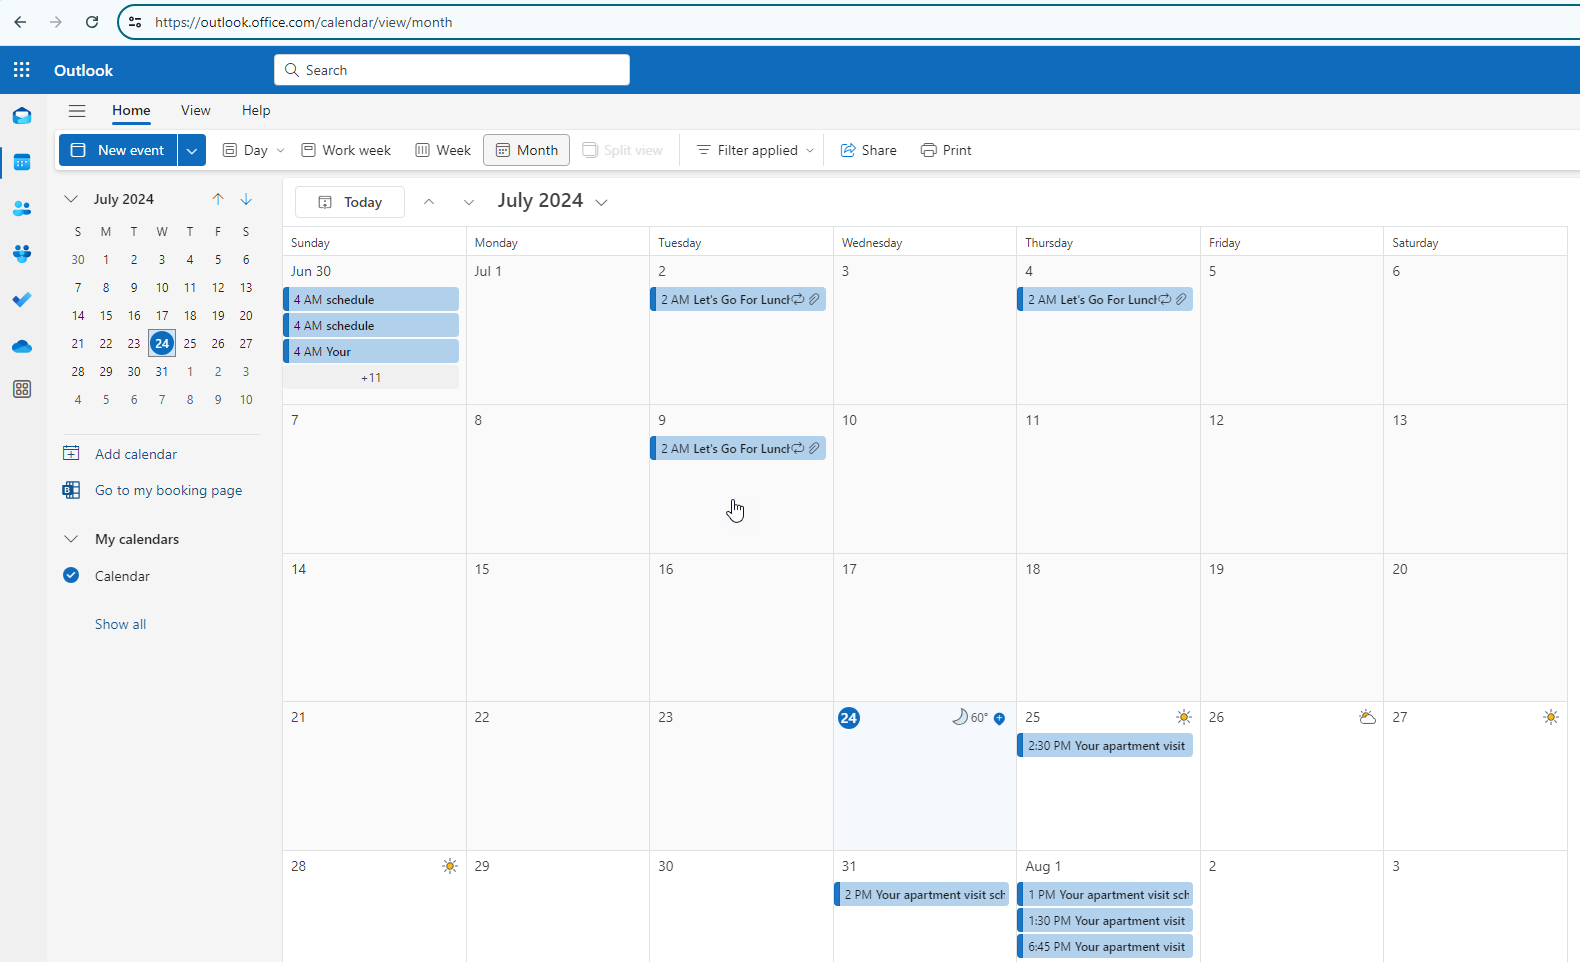
Office365 Calendar-- https://outlook.office.com/calendar/view/month
There are two types of request headers are used in the Event creation.
- Authorization: we set access token Bearer {token}. Required.
- Content-Type: we set content type application/json for JSON object. Required.
Request Body: In the request body, supply a JSON representation of event object. The following example shows a request.
{
"subject": "Plan summer company picnic",
"body": {
"contentType": "HTML",
"content": "Let's kick-start this event planning!"
},
"start": {
"dateTime": "2017-08-30T11:00:00",
"timeZone": "Pacific Standard Time"
},
"end": {
"dateTime": "2017-08-30T12:00:00",
"timeZone": "Pacific Standard Time"
},
"attendees": [
{
"emailAddress": {
"address": "DanaS@contoso.com",
"name": "Dana Swope"
},
"type": "Required"
},
{
"emailAddress": {
"address": "AlexW@contoso.com",
"name": "Alex Wilber"
},
"type": "Required"
}
],
"location": {
"displayName": "Conf Room 3; Fourth Coffee; Home Office",
"locationType": "Default"
},
"locations": [
{
"displayName": "Conf Room 3"
},
{
"displayName": "Fourth Coffee",
"address": {
"street": "4567 Main St",
"city": "Redmond",
"state": "WA",
"countryOrRegion": "US",
"postalCode": "32008"
},
"coordinates": {
"latitude": 47.672,
"longitude": -102.103
}
},
{
"displayName": "Home Office"
}
],
"allowNewTimeProposals": true
}
There are many properties for Office 365 events. Some properties are required, while others are optional. I have mentioned below what each property is used for.
Explanation of JSON Properties:
Subject:
The text of the event's subject line.
Body:
The body of the message associated with the event. It can be in HTML or text format.
Start:
Provide the date and time when the event should start, along with the time zone.
dateTime: *
Event Start date and time. (e.g. Fri May 17 2024 02:00:00 GMT-0400)
timeZone: *
Time zone of the start time. (e.g. Eastern Standard Time)
End:
Provide the date and time when the event should End, along with the time zone.
dateTime: *
Event End date and time. (e.g. Fri May 17 2024 06:30:00 GMT-0400)
timeZone: *
Time zone of the end time. (e.g. Eastern Standard Time)
Attendees:
Attendees are individuals invited to a calendar event. Wherever the attendee is invited, their name and email address must be specified in the attendee properties. We use the attendees as list. Invitations can be sent to multiple attendees at the same time.
"attendees": [
{
"emailAddress": {
"address": "DanaS@contoso.com",
"name": "Dana Swope"
},
"type": "Required"
},
{
"emailAddress": {
"address": "AlexW@contoso.com",
"name": "Alex Wilber"
},
"type": "Required"
}
]
We can send invitation in both attendees.
emailAddress*: Attendee’s mail address.
Name: Attendee’s name.
Location:
The location of the event. This location property has dispalyName and location Type.
- display Name: The name associated with the location.
- location Type: The type of location. The possible values are default,conferenceRoom,homeAddress.
Locations:
The locations where the event is held or attended from. The location and locations properties always correspond with each other.
Within the location properties, there are display name, address, and coordinates. The address includes street, city, state, postal code, and country or region. Similarly, coordinates include latitude and longitude. Locations are used to specify where the meeting will take place. We use the locations as list. It is an array. The user can select multiple locations to set up the meeting.
allowNewTimeProposals:
The allowNewTimeProposals property is a Boolean value that indicates whether the meeting organizer allows invitees to suggest a new time for the meeting when they respond to the invitation.
- If allowNewTimeProposals is set to true, invitees can propose new times for the meeting.
- If allowNewTimeProposals is set to false, invitees cannot suggest new times.
Attachments:
When creating an event, if you want to include attachments, you can add them by specifying the file path and name in the attachment’s properties. However, including attachments is not required. But these three requirements are required if attachments are there. Statically use like this,
@odata.type*: ""#microsoft.graph.fileAttachment"",
contentBytes*: ""actual-base64-encoded-content"",
attachmentsFilePath*: ""Your_file_path""
If you need to add multiple attachments, you can add. We’ve provided a list for attachments, allowing you to create multiple attachments. The multiple attachment JSON format like this,
"attachments": [
{
"contentBytes": "base64-encoded-content",
"@odata.type": "#microsoft.graph.fileAttachment",
"attachmentsFilePath": "\\\\hc1-fs1\\WebStorage\\CadebillCloud\\CadebillLogs\\Invoice\\DBServer5Admin_Invoice_Err.txt"
},
{
"contentBytes": "base64-encoded-content",
"@odata.type": "#microsoft.graph.fileAttachment",
"attachmentsFilePath": "\\\\hc1-fs1\\WebStorage\\CadebillCloud\\SECABS\\work\\log\\send_email_log.txt"
}
]
isAttachments:
It is Boolean type. Set to true if the event has attachments. If true, attachments should be allowed; if false, attachments should not be sent.
hideAttendees :
It is Boolean type.When set to true, each attendee only sees themselves in the meeting request and meeting Tracking list. Default is false.
User ID *:
The user name of the calendar event. The event name like this,testuser@cadebill.onmicrosoft.com.it is required.
Recurrence Rule:
Recurrence rule object for the event.
recurrence:
The recurrence field is a list of recurrence rule objects.
[{"RRule":"FREQ=WEEKLY;COUNT=3;INTERVAL=1;BYHOUR=4;BYMINUTE=0;BYSECOND=0;BYDAY=TU,TH;WKST=SU"}]
For example:
- FREQ=WEEKLY: The event occurs weekly.
- COUNT=3: The event will repeat 3 times.
- INTERVAL=1: The event repeats every week.
- BYHOUR=4: The event occurs at 4 AM.
- BYMINUTE=0: The event occurs at the 0th minute of the hour.
- BYSECOND=0: The event occurs at the 0th second of the minute.
- BYDAY=TU,TH: The event occurs on Tuesdays and Thursdays.
- WKST=SU: The week starts on Sunday.